How to create an expert profile
This guide will help you step by step to create and set up your professional profile on the Asap Expert platform. Follow all the steps in order so that clients can easily find you and choose your services.
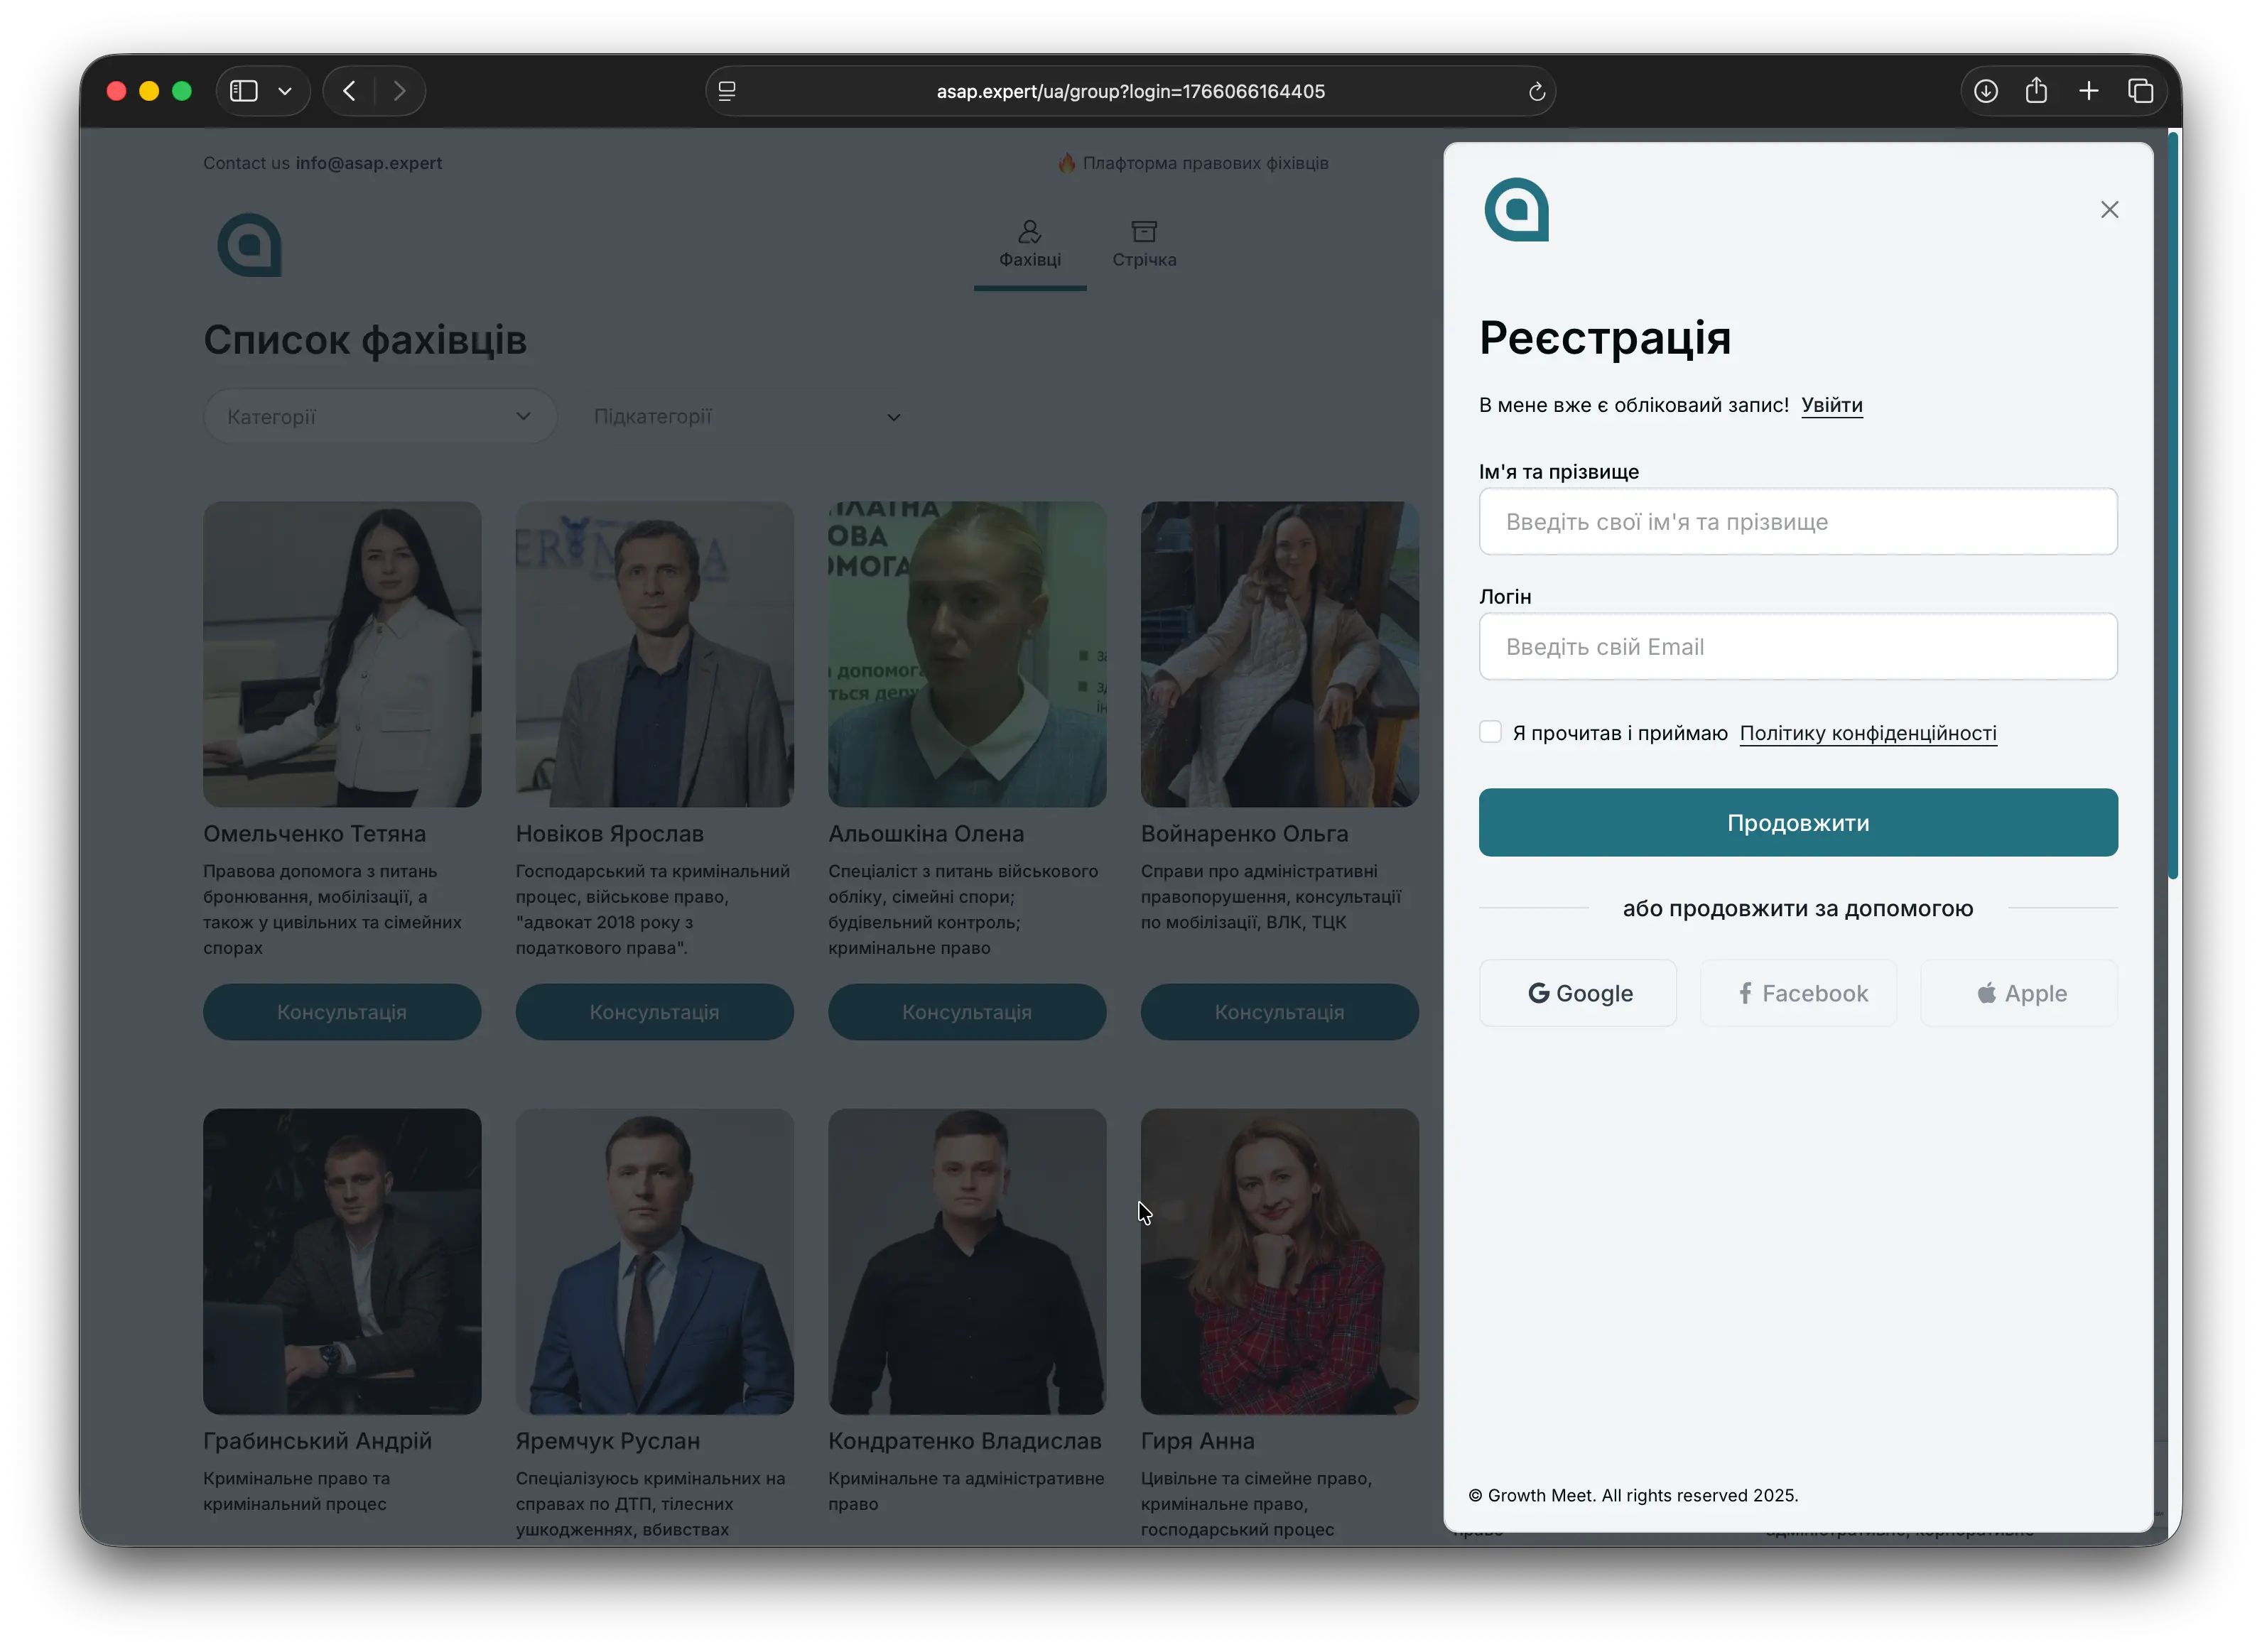
Sign in to the platform
To get started, you need to sign in:
- Sign in with your Google account or
- Create a new account on the Asap Expert platform.
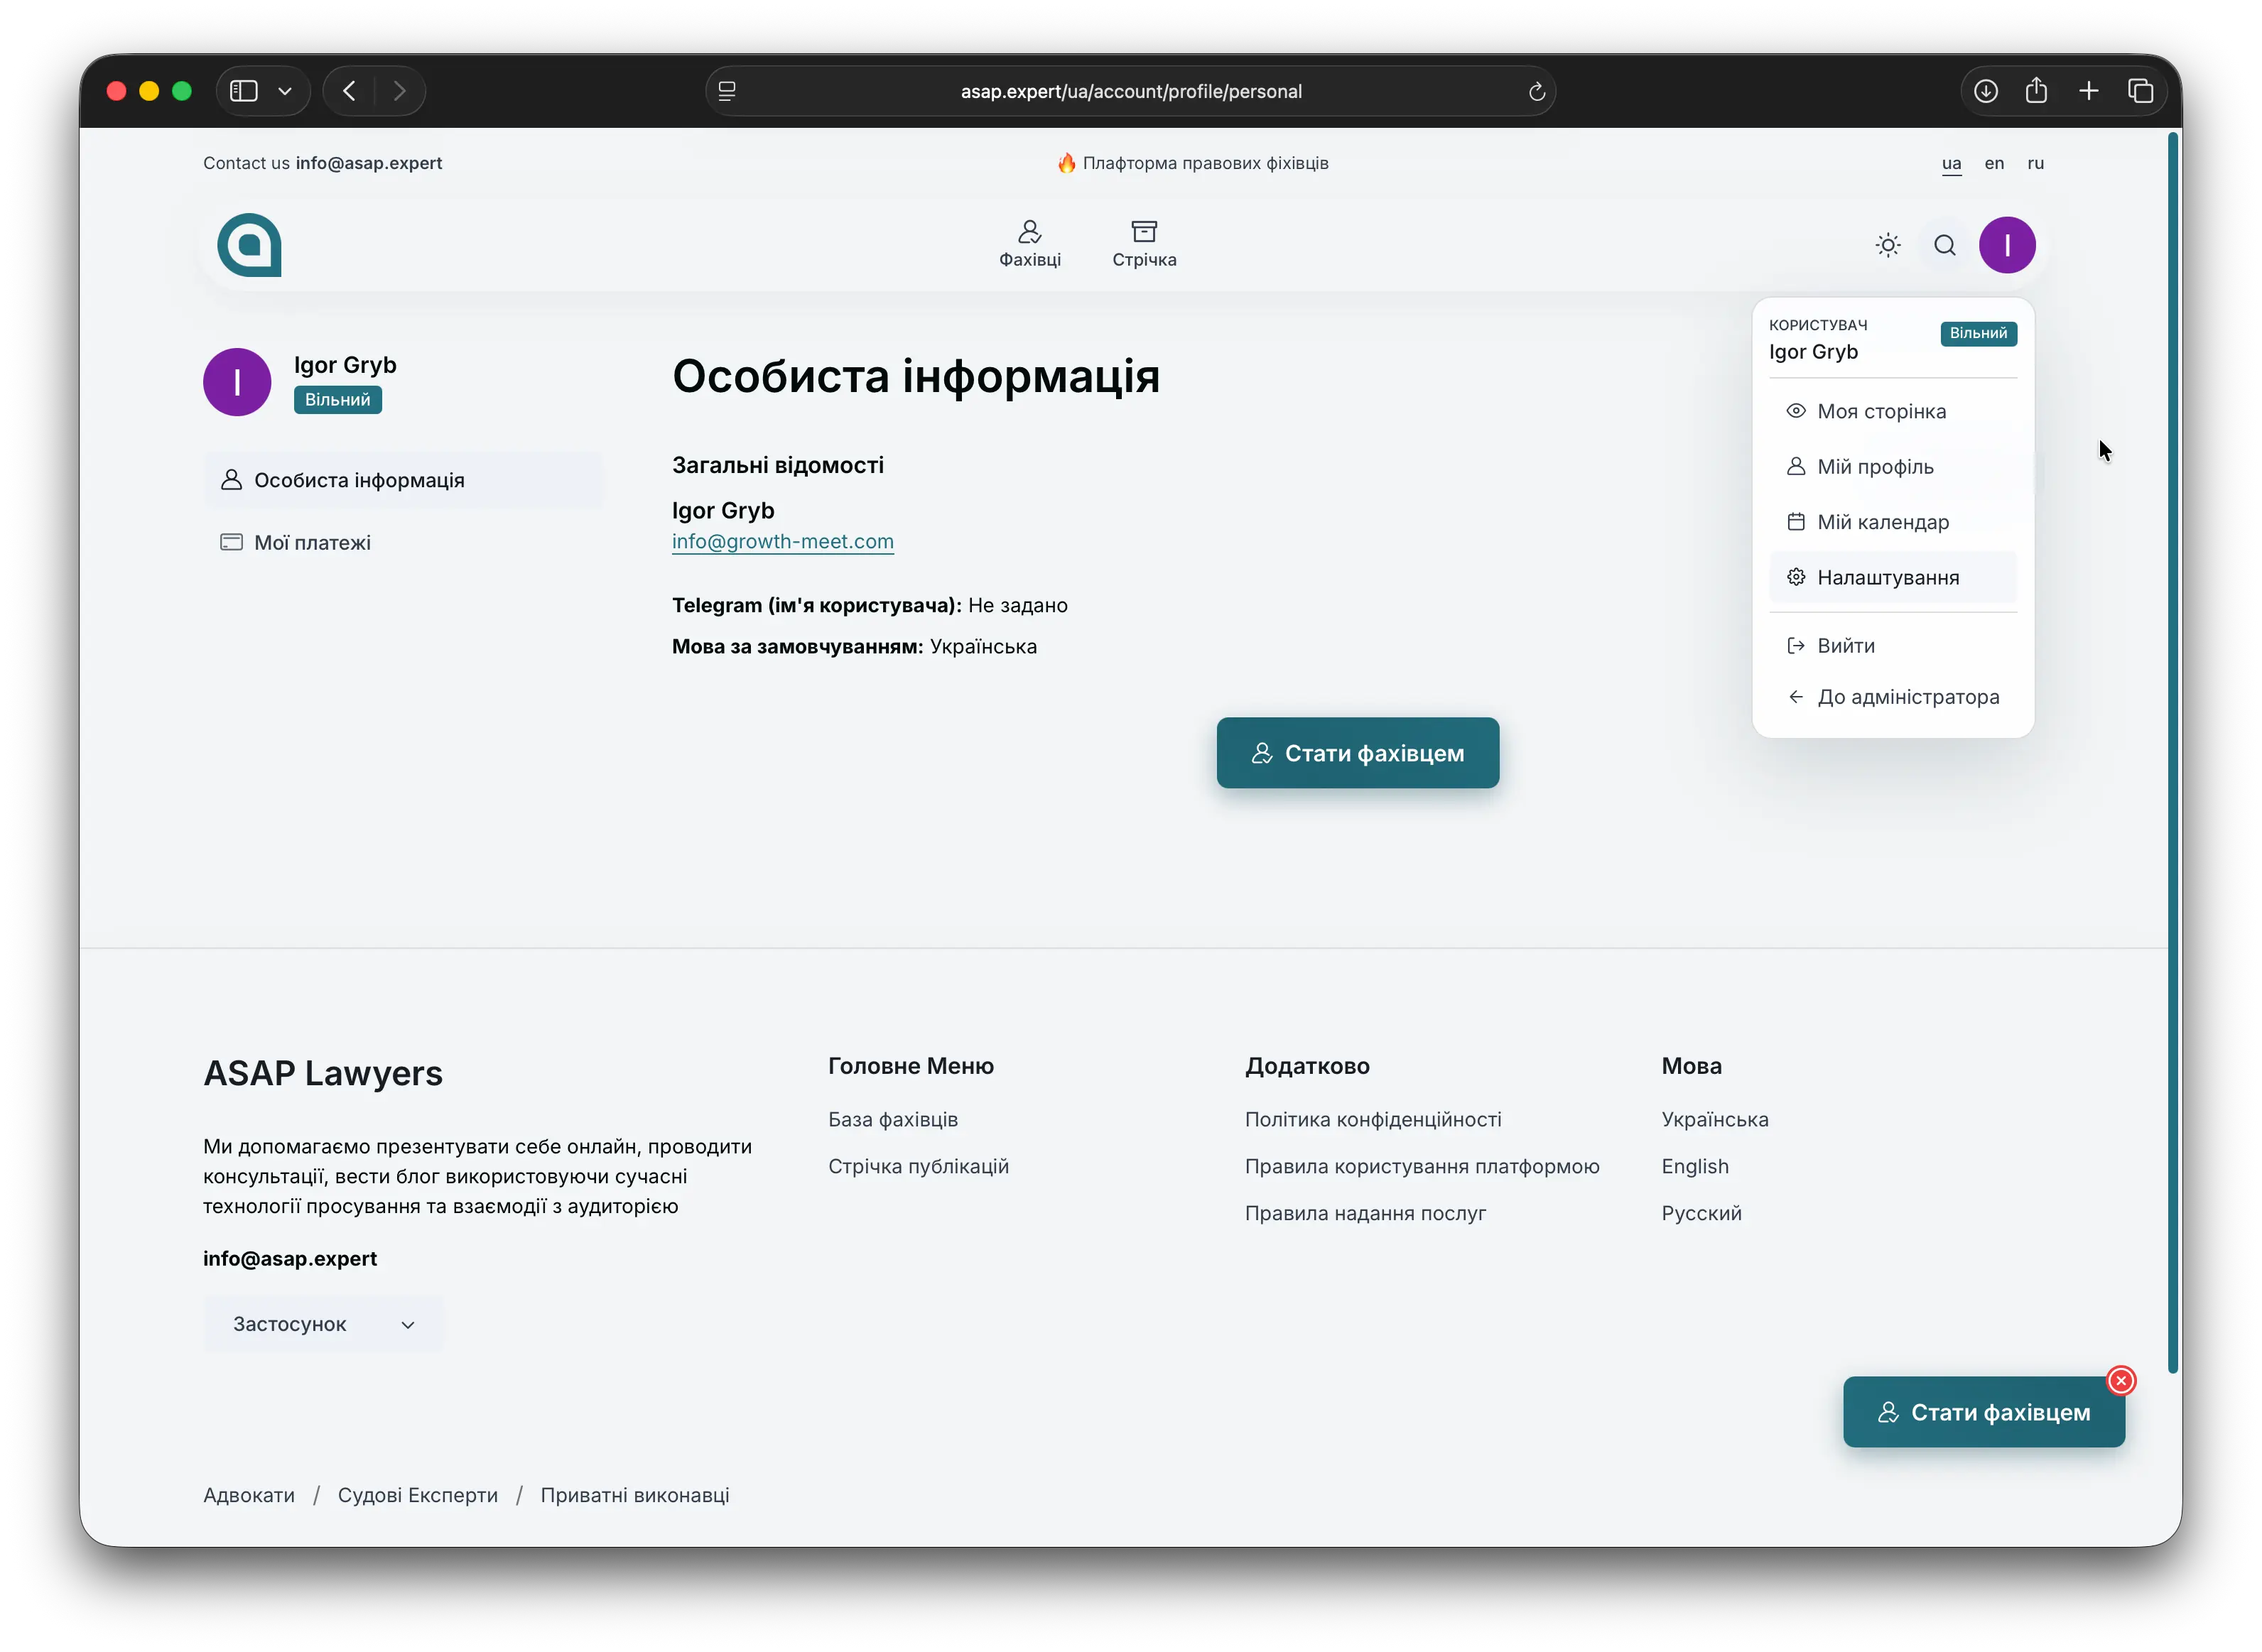
Go to your profile
After signing in:
- Click on your avatar at the top of the page.
- In the dropdown menu, select “My profile”.
- On your profile page, click the “Become an expert” button.
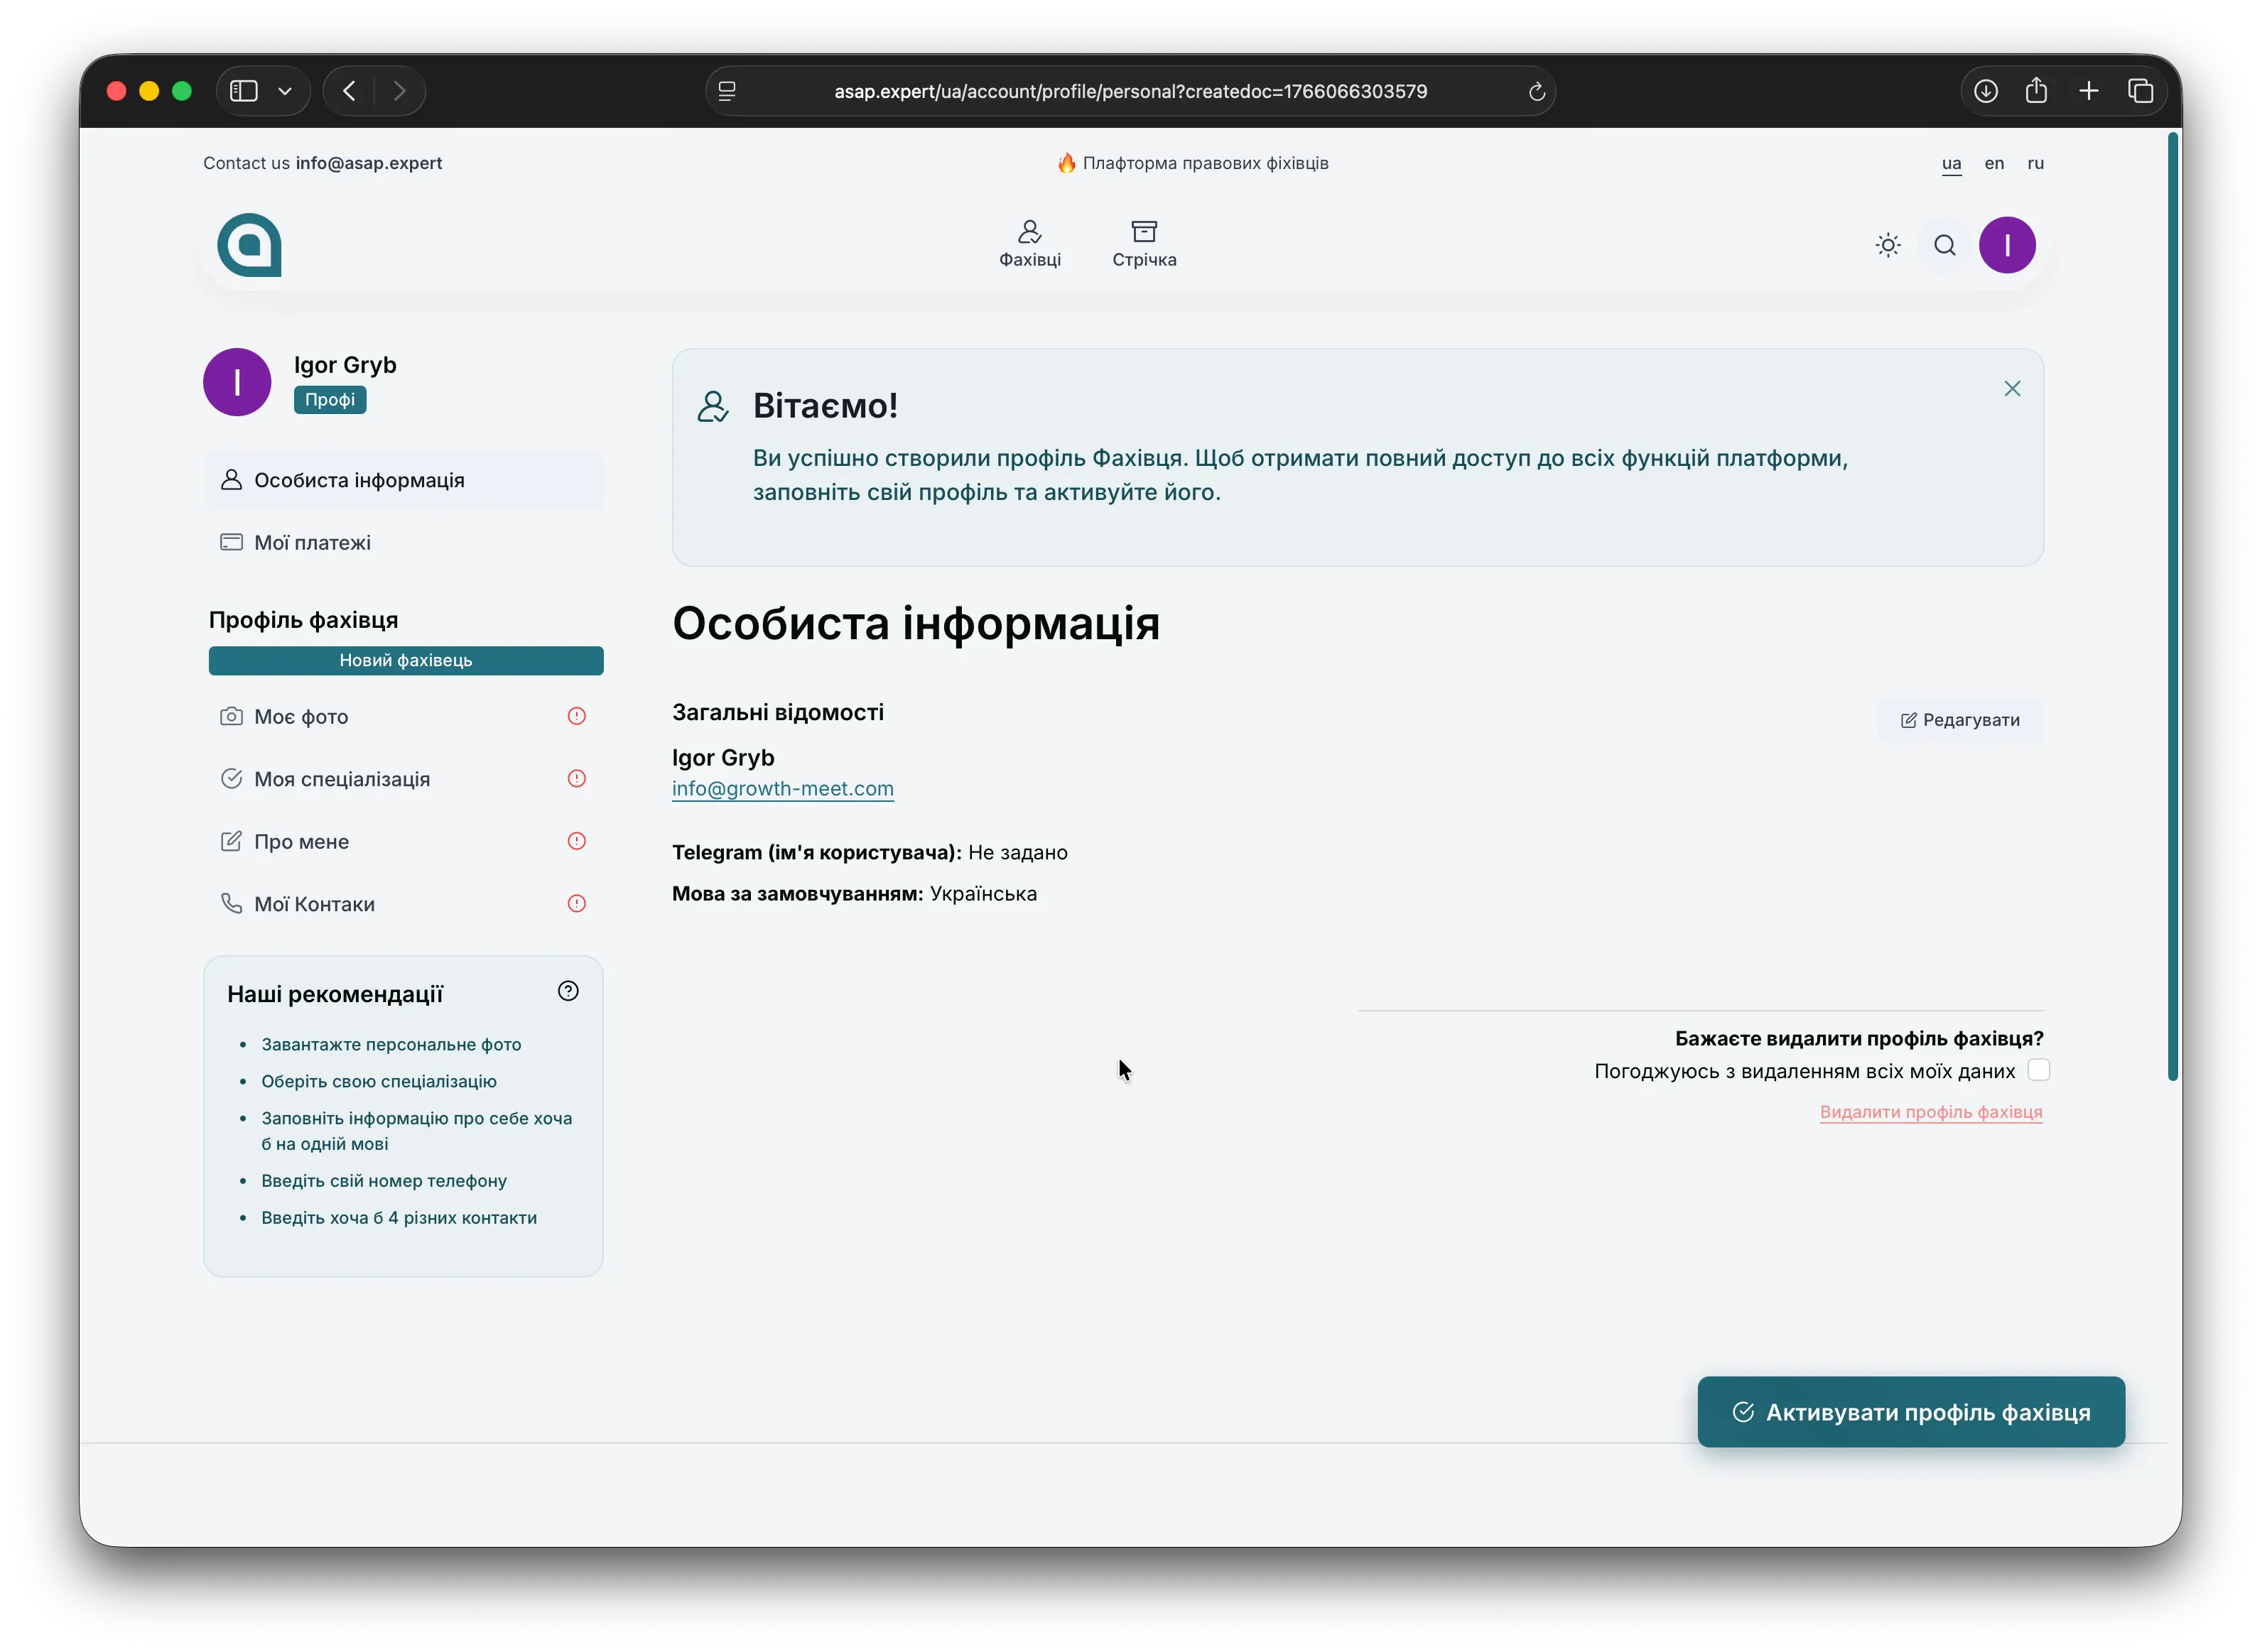
Expert profile creation
After clicking “Become an expert”, the system will automatically create an expert profile for you.
Next, you need to fill it in with relevant information about your activity: what you do, how you work, and who your services are best suited for.
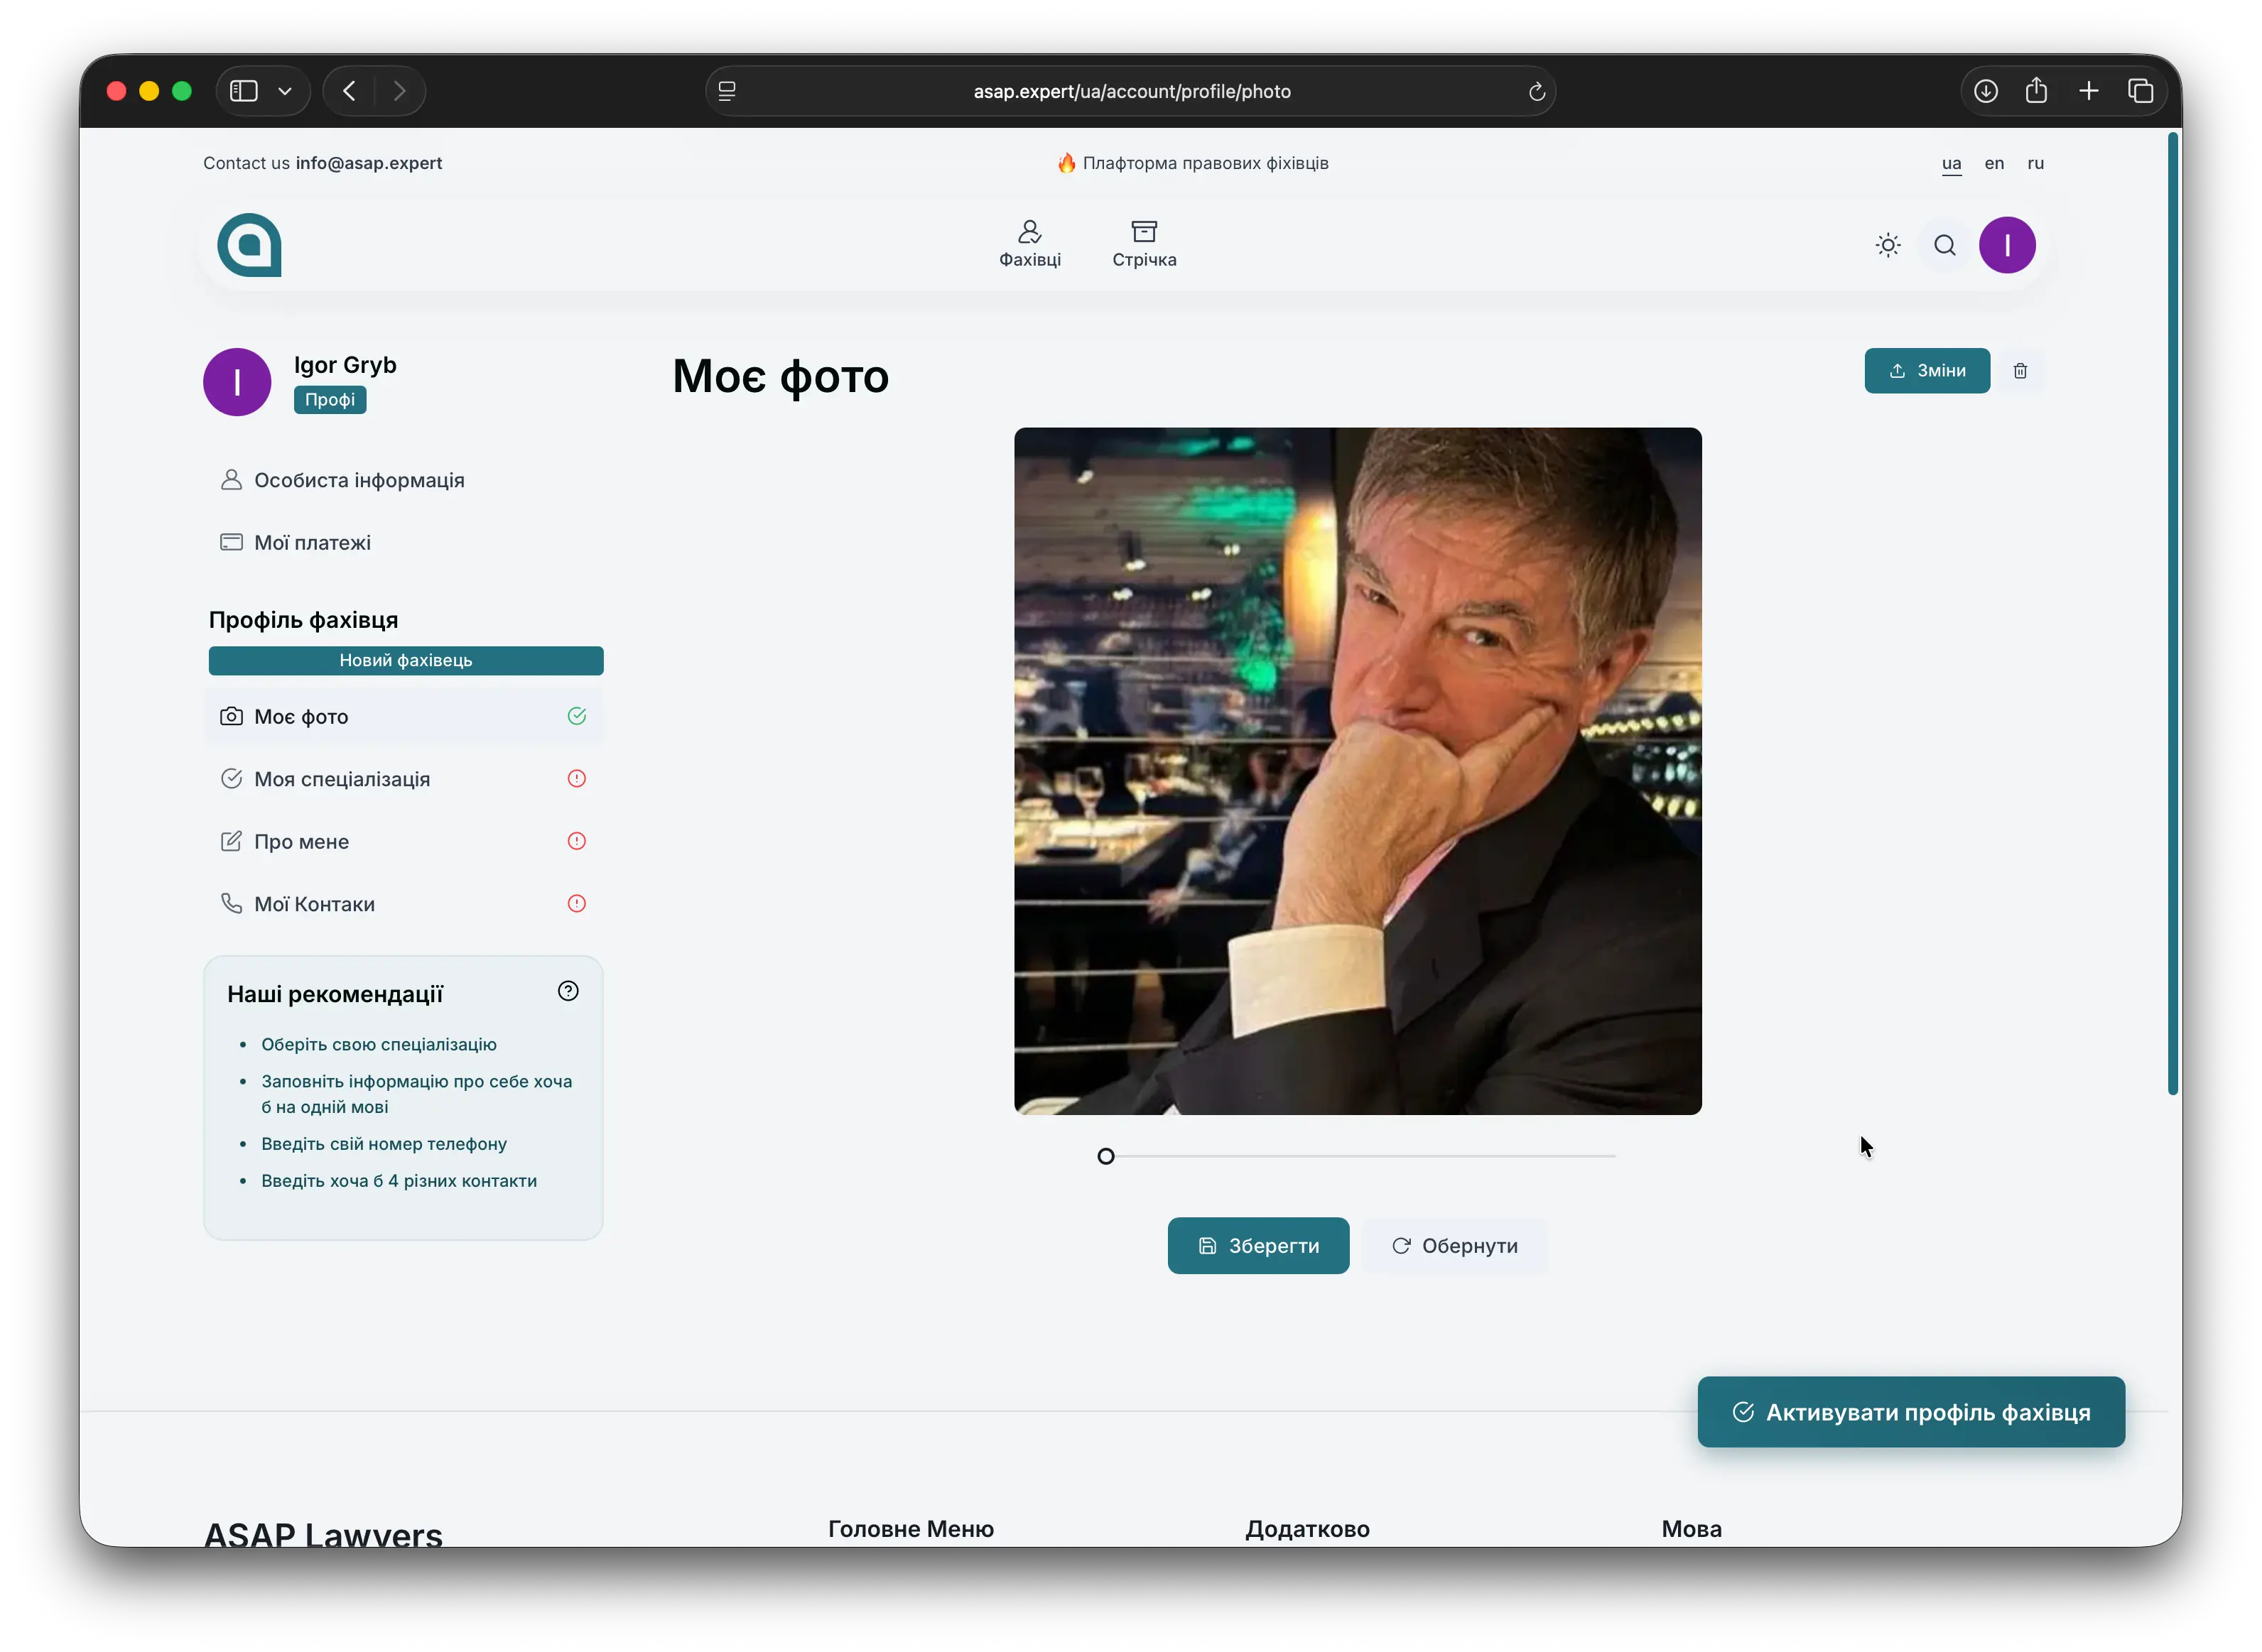
Upload your photo
Add a high‑quality photo in a professional style:
- Choose a photo where your face is clearly visible.
- A neutral or professional background works best.
- Avoid overly informal images — this is your professional image for clients.
Activate your specializations
In the specializations block:
- Select the areas in which you actually work.
- Choose only relevant options — this helps the platform show you to the right clients.

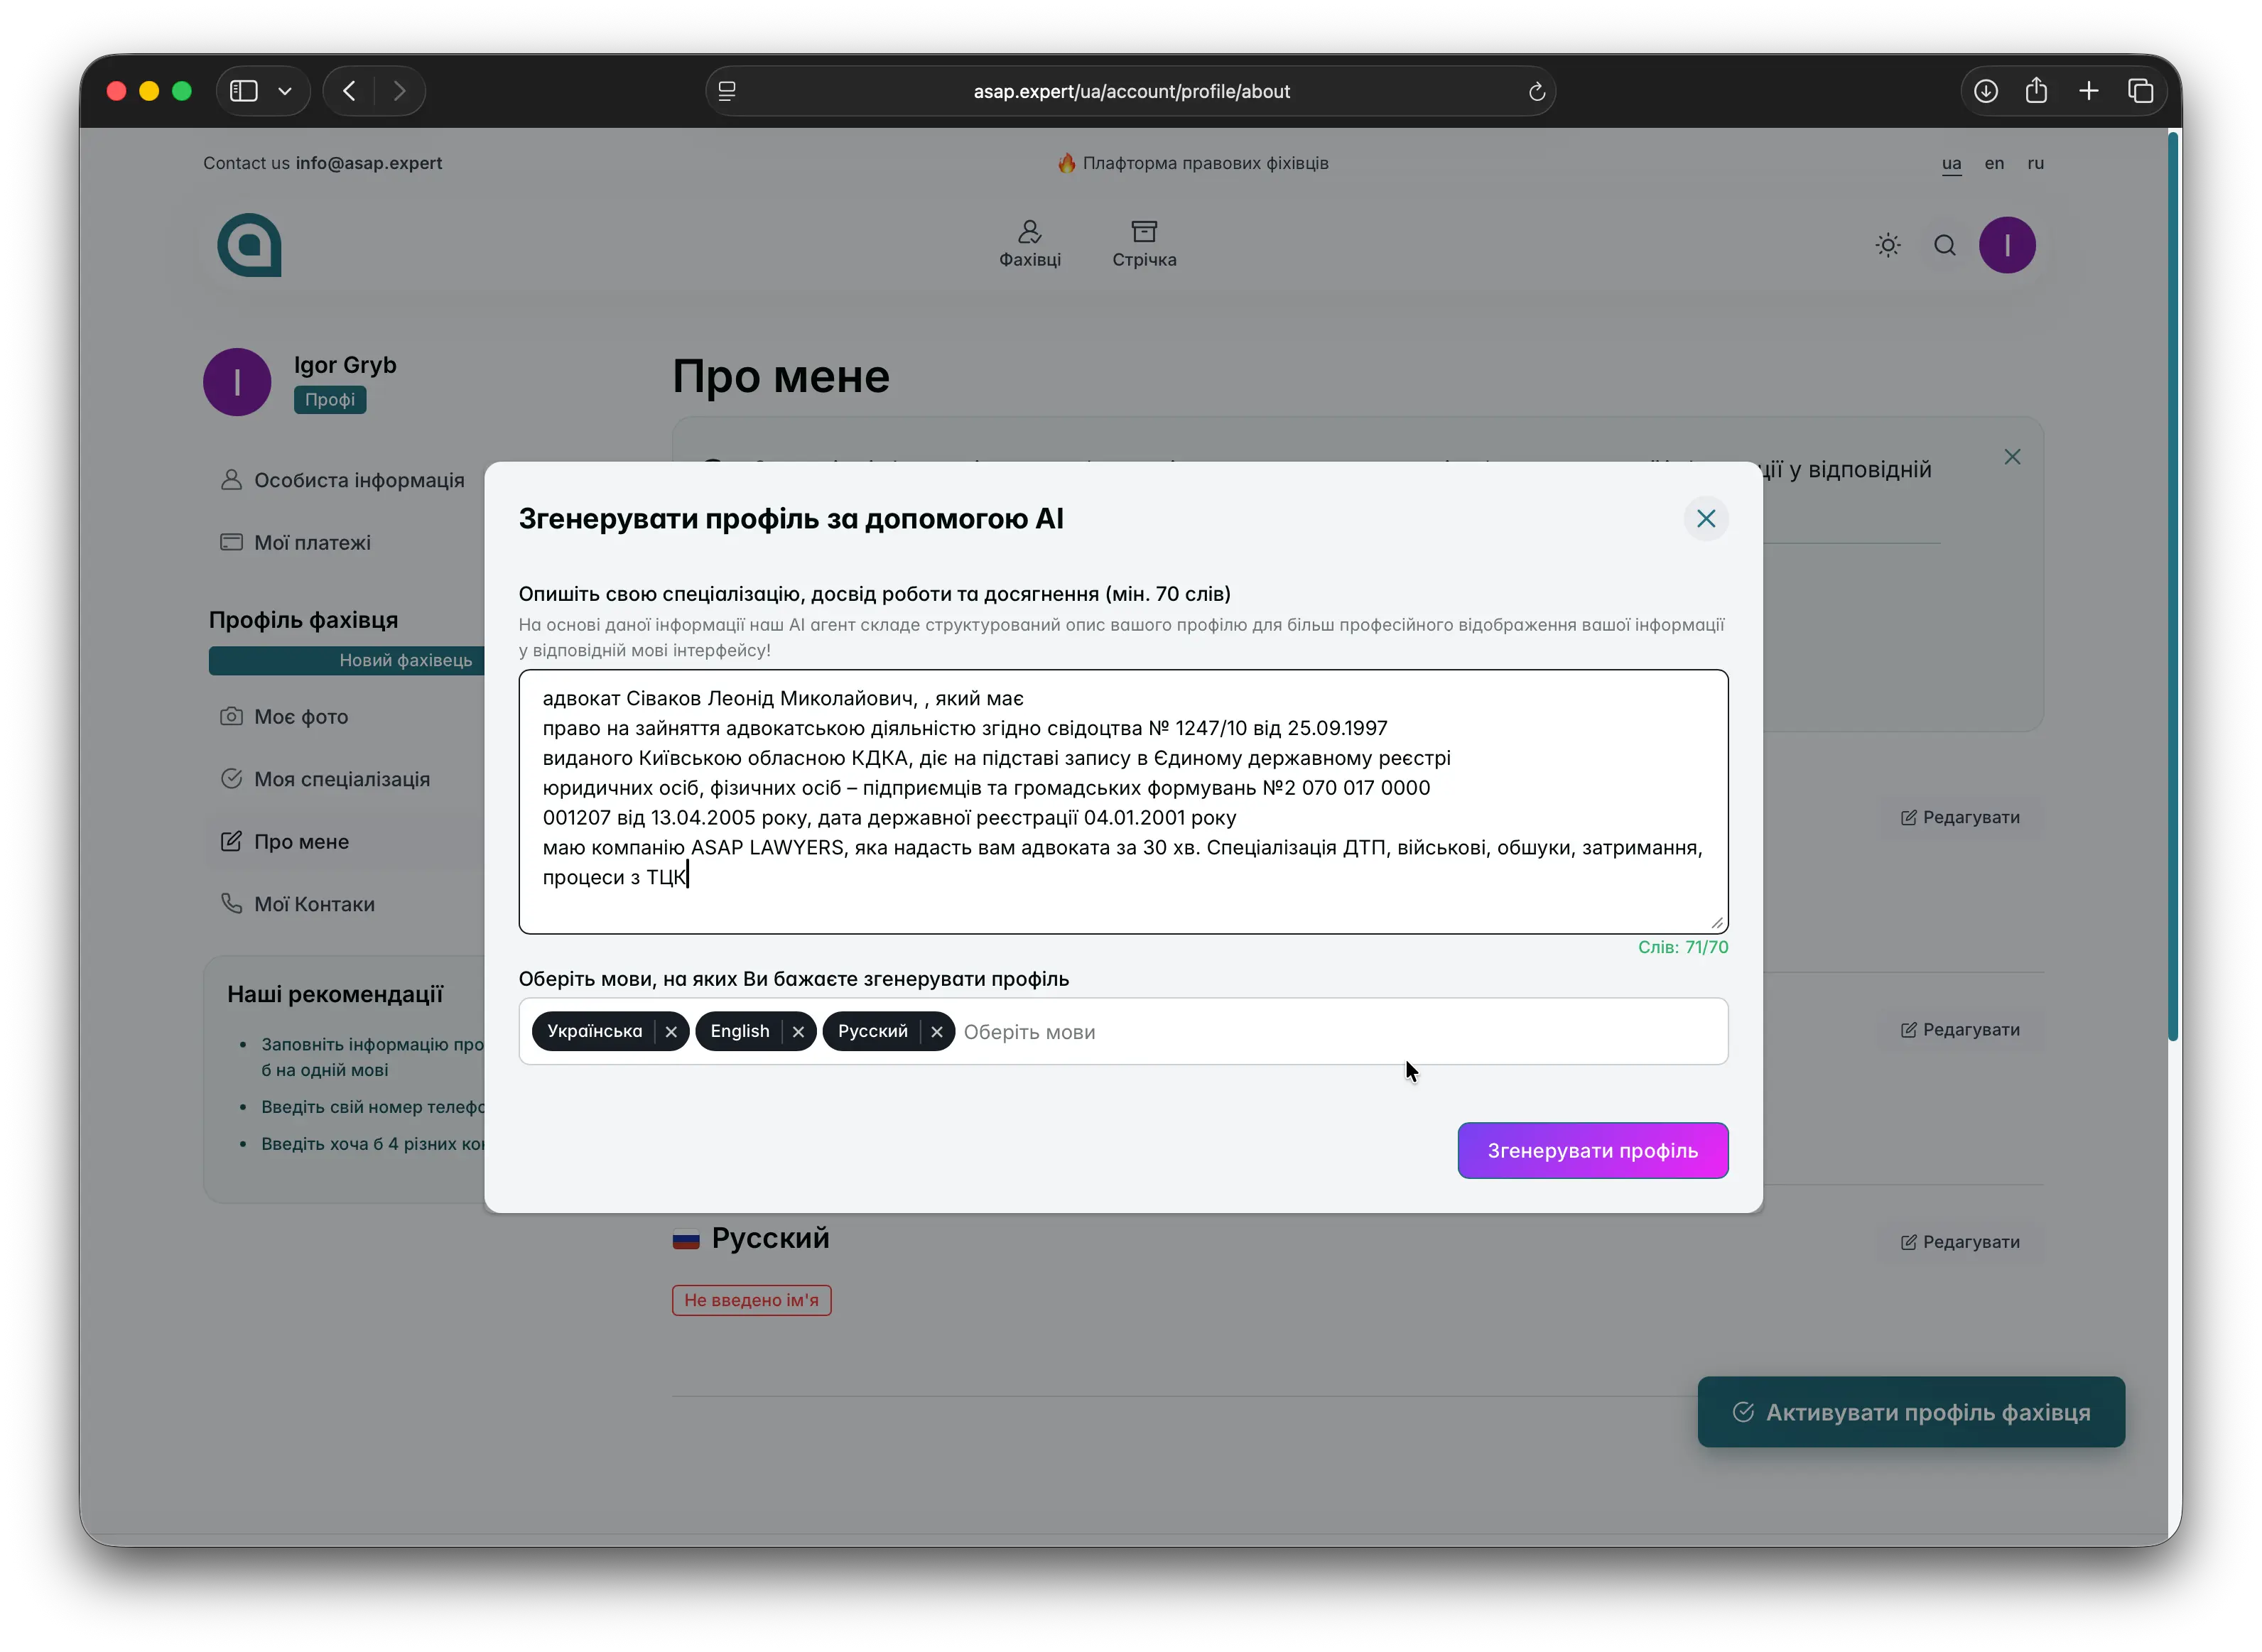
Fill in a detailed description
You can:
- Manually fill in information about yourself in all available languages or
- Use the “AI help” option: enter free‑form information about yourself, your work, achievements and experience — based on this, we will generate a professional profile description in all platform languages.
The more detailed and specific your description is, the easier it is for clients to understand how exactly you can help them.
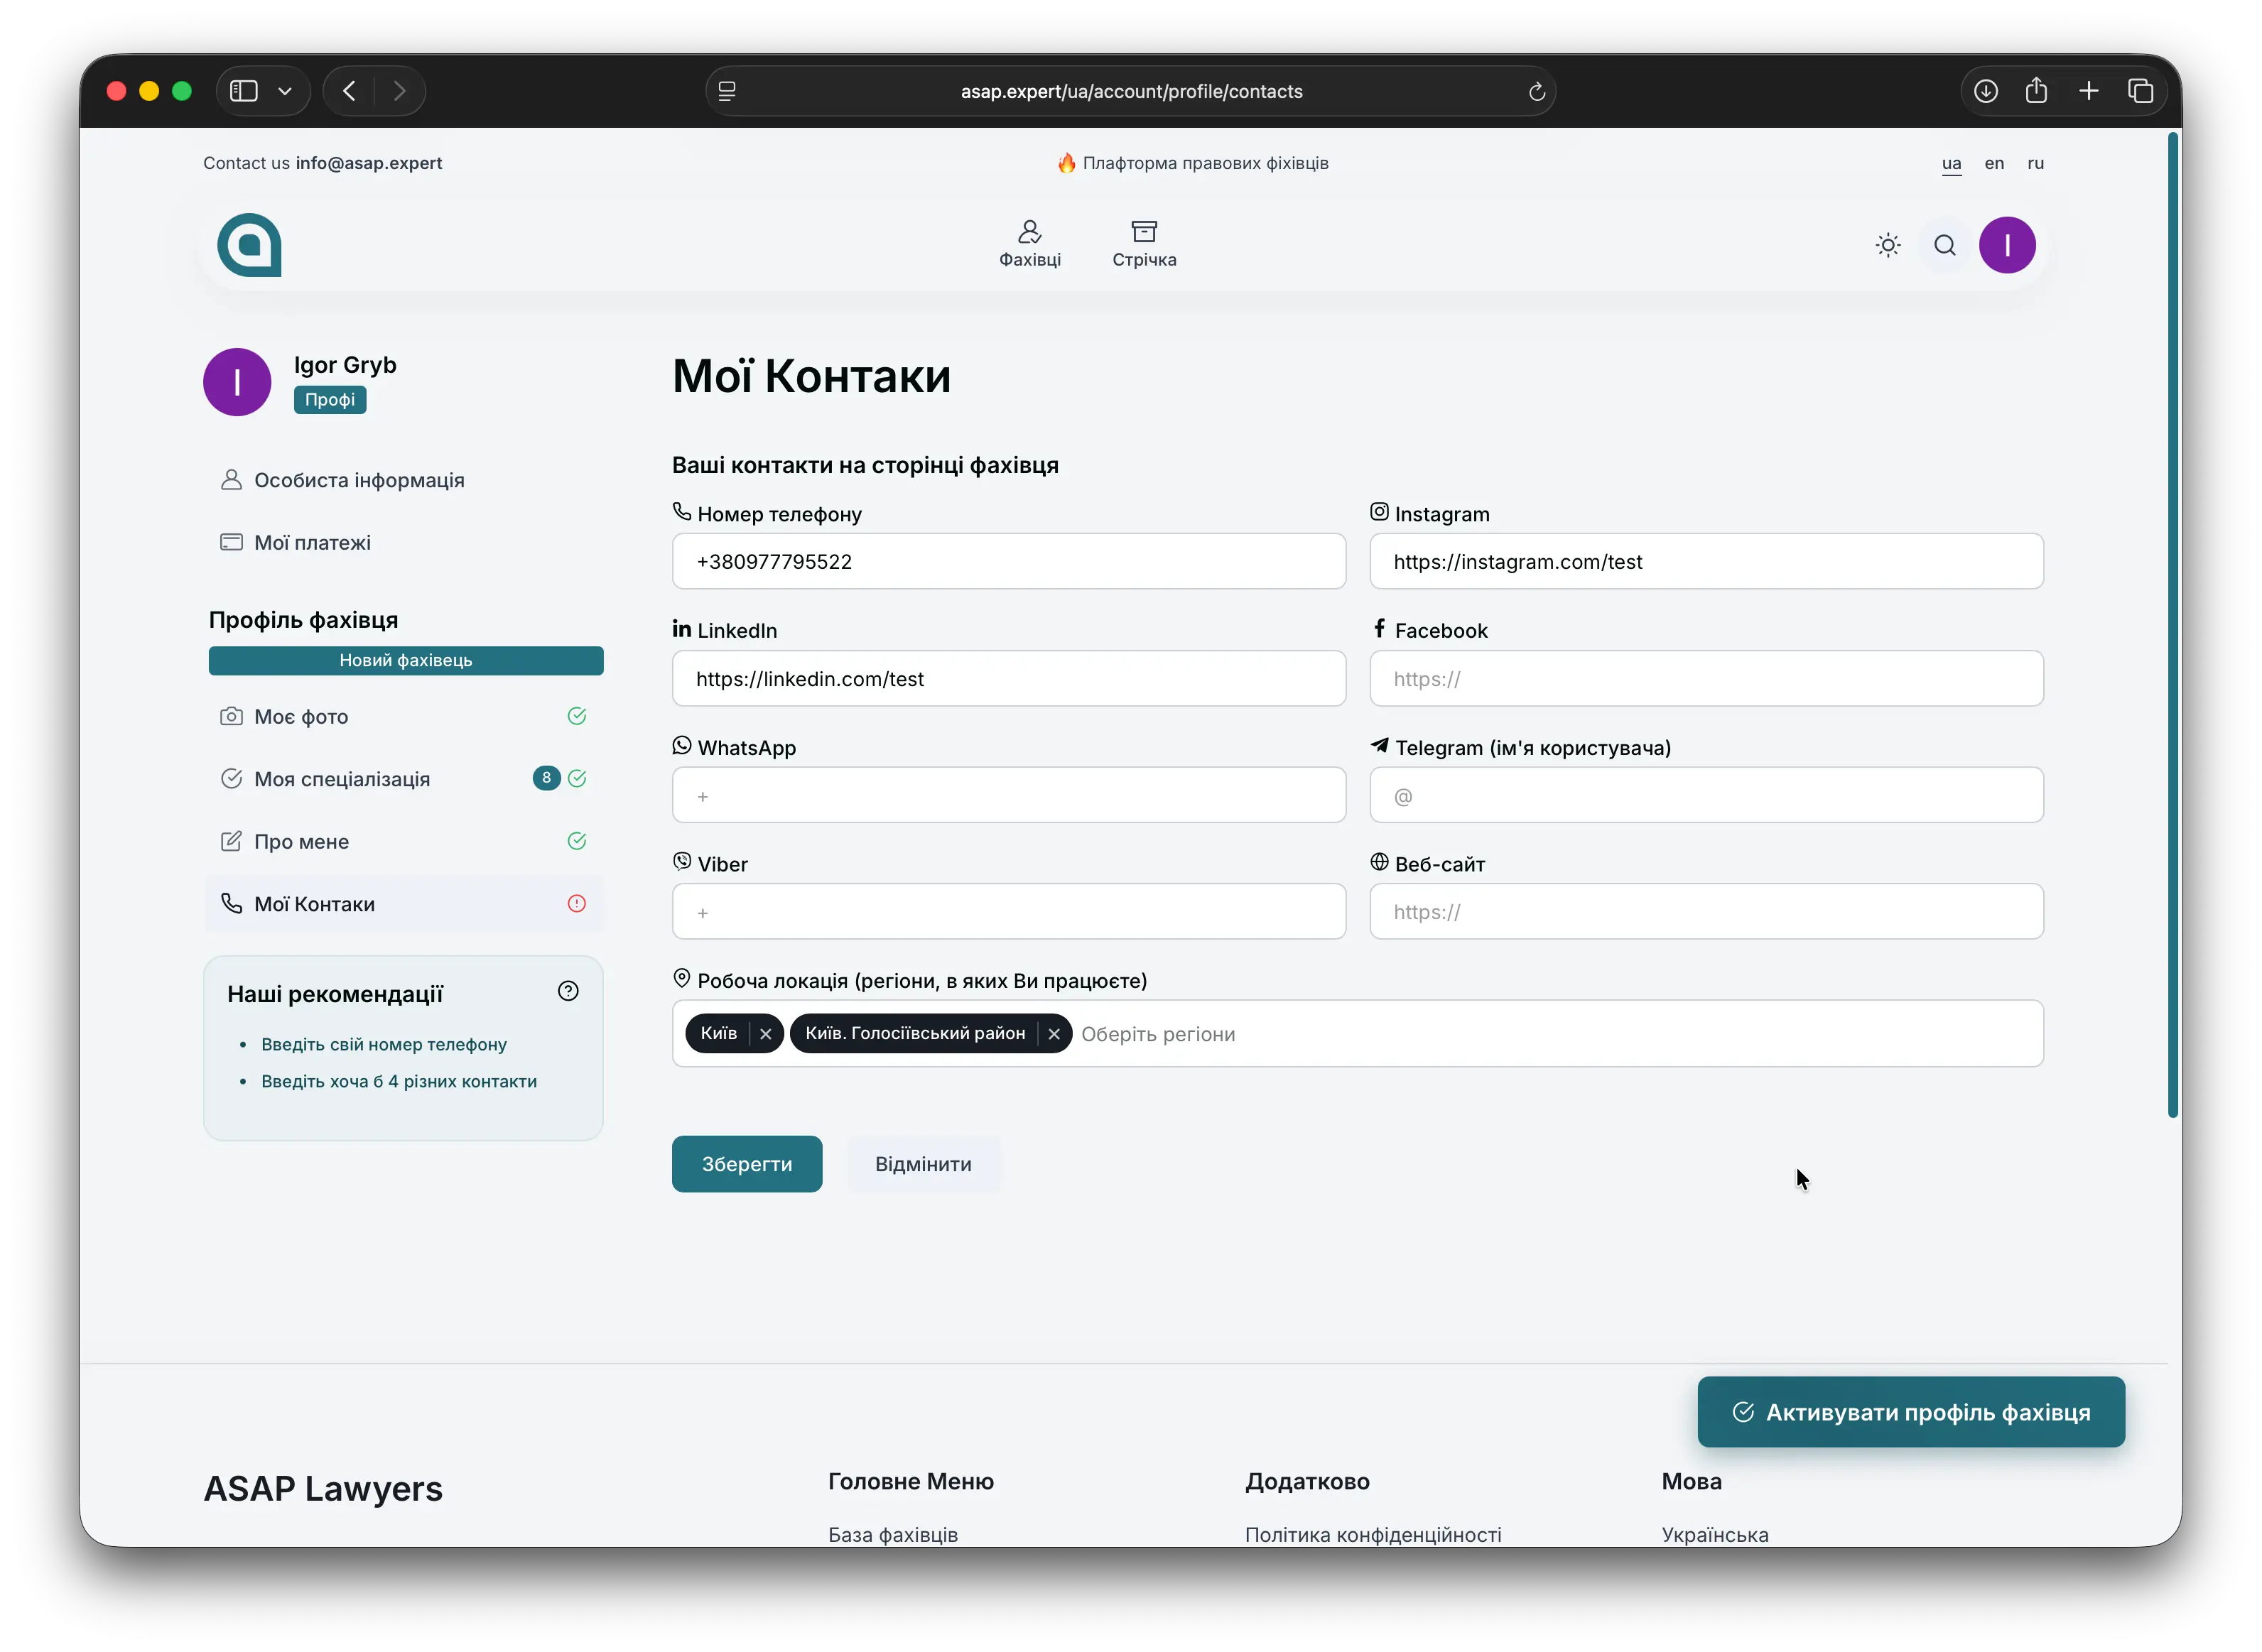
Fill in your contact details
So that clients can easily reach you:
- Go to the “My contacts” section.
- Click the “Edit” button.
- Fill in all required fields (email, phone, links to social networks or messengers, if needed).
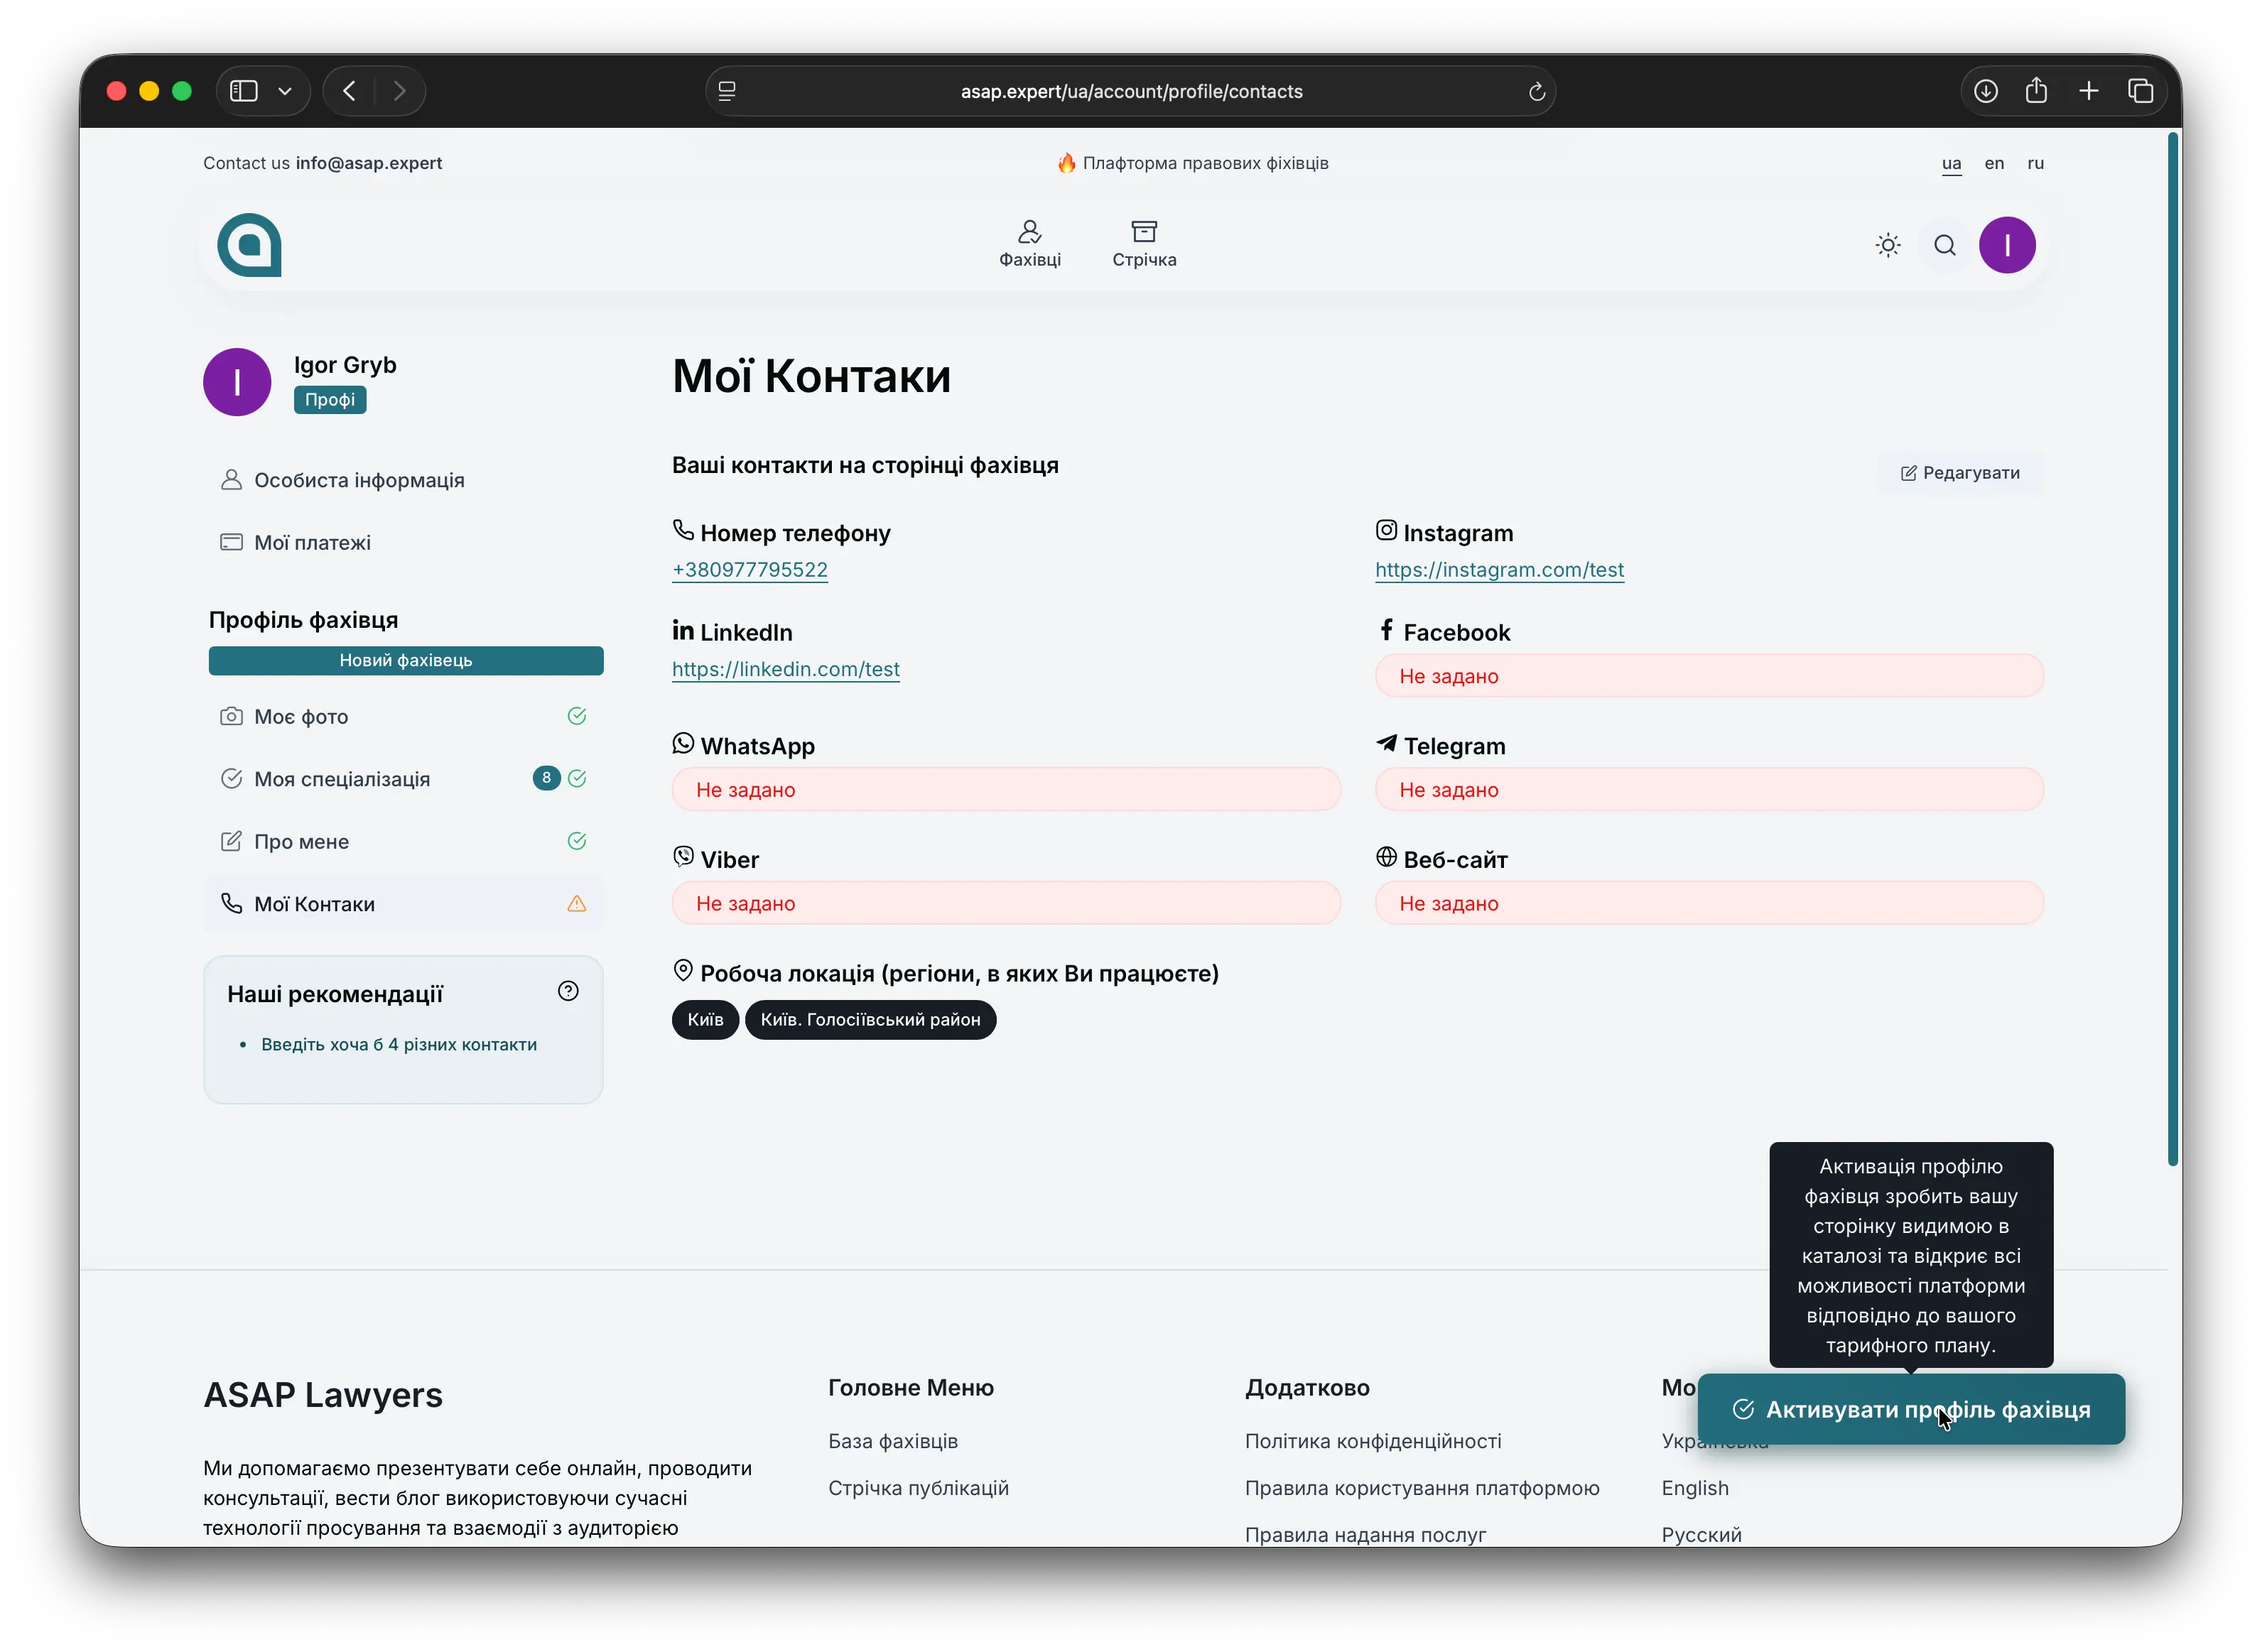
Activate your profile
Once you have:
- Filled in the main information about yourself;
- Added a photo;
- Activated your specializations;
- Added your contact details;
— activate your expert profile. After activation, your profile becomes visible to platform users, and you can start receiving client requests.
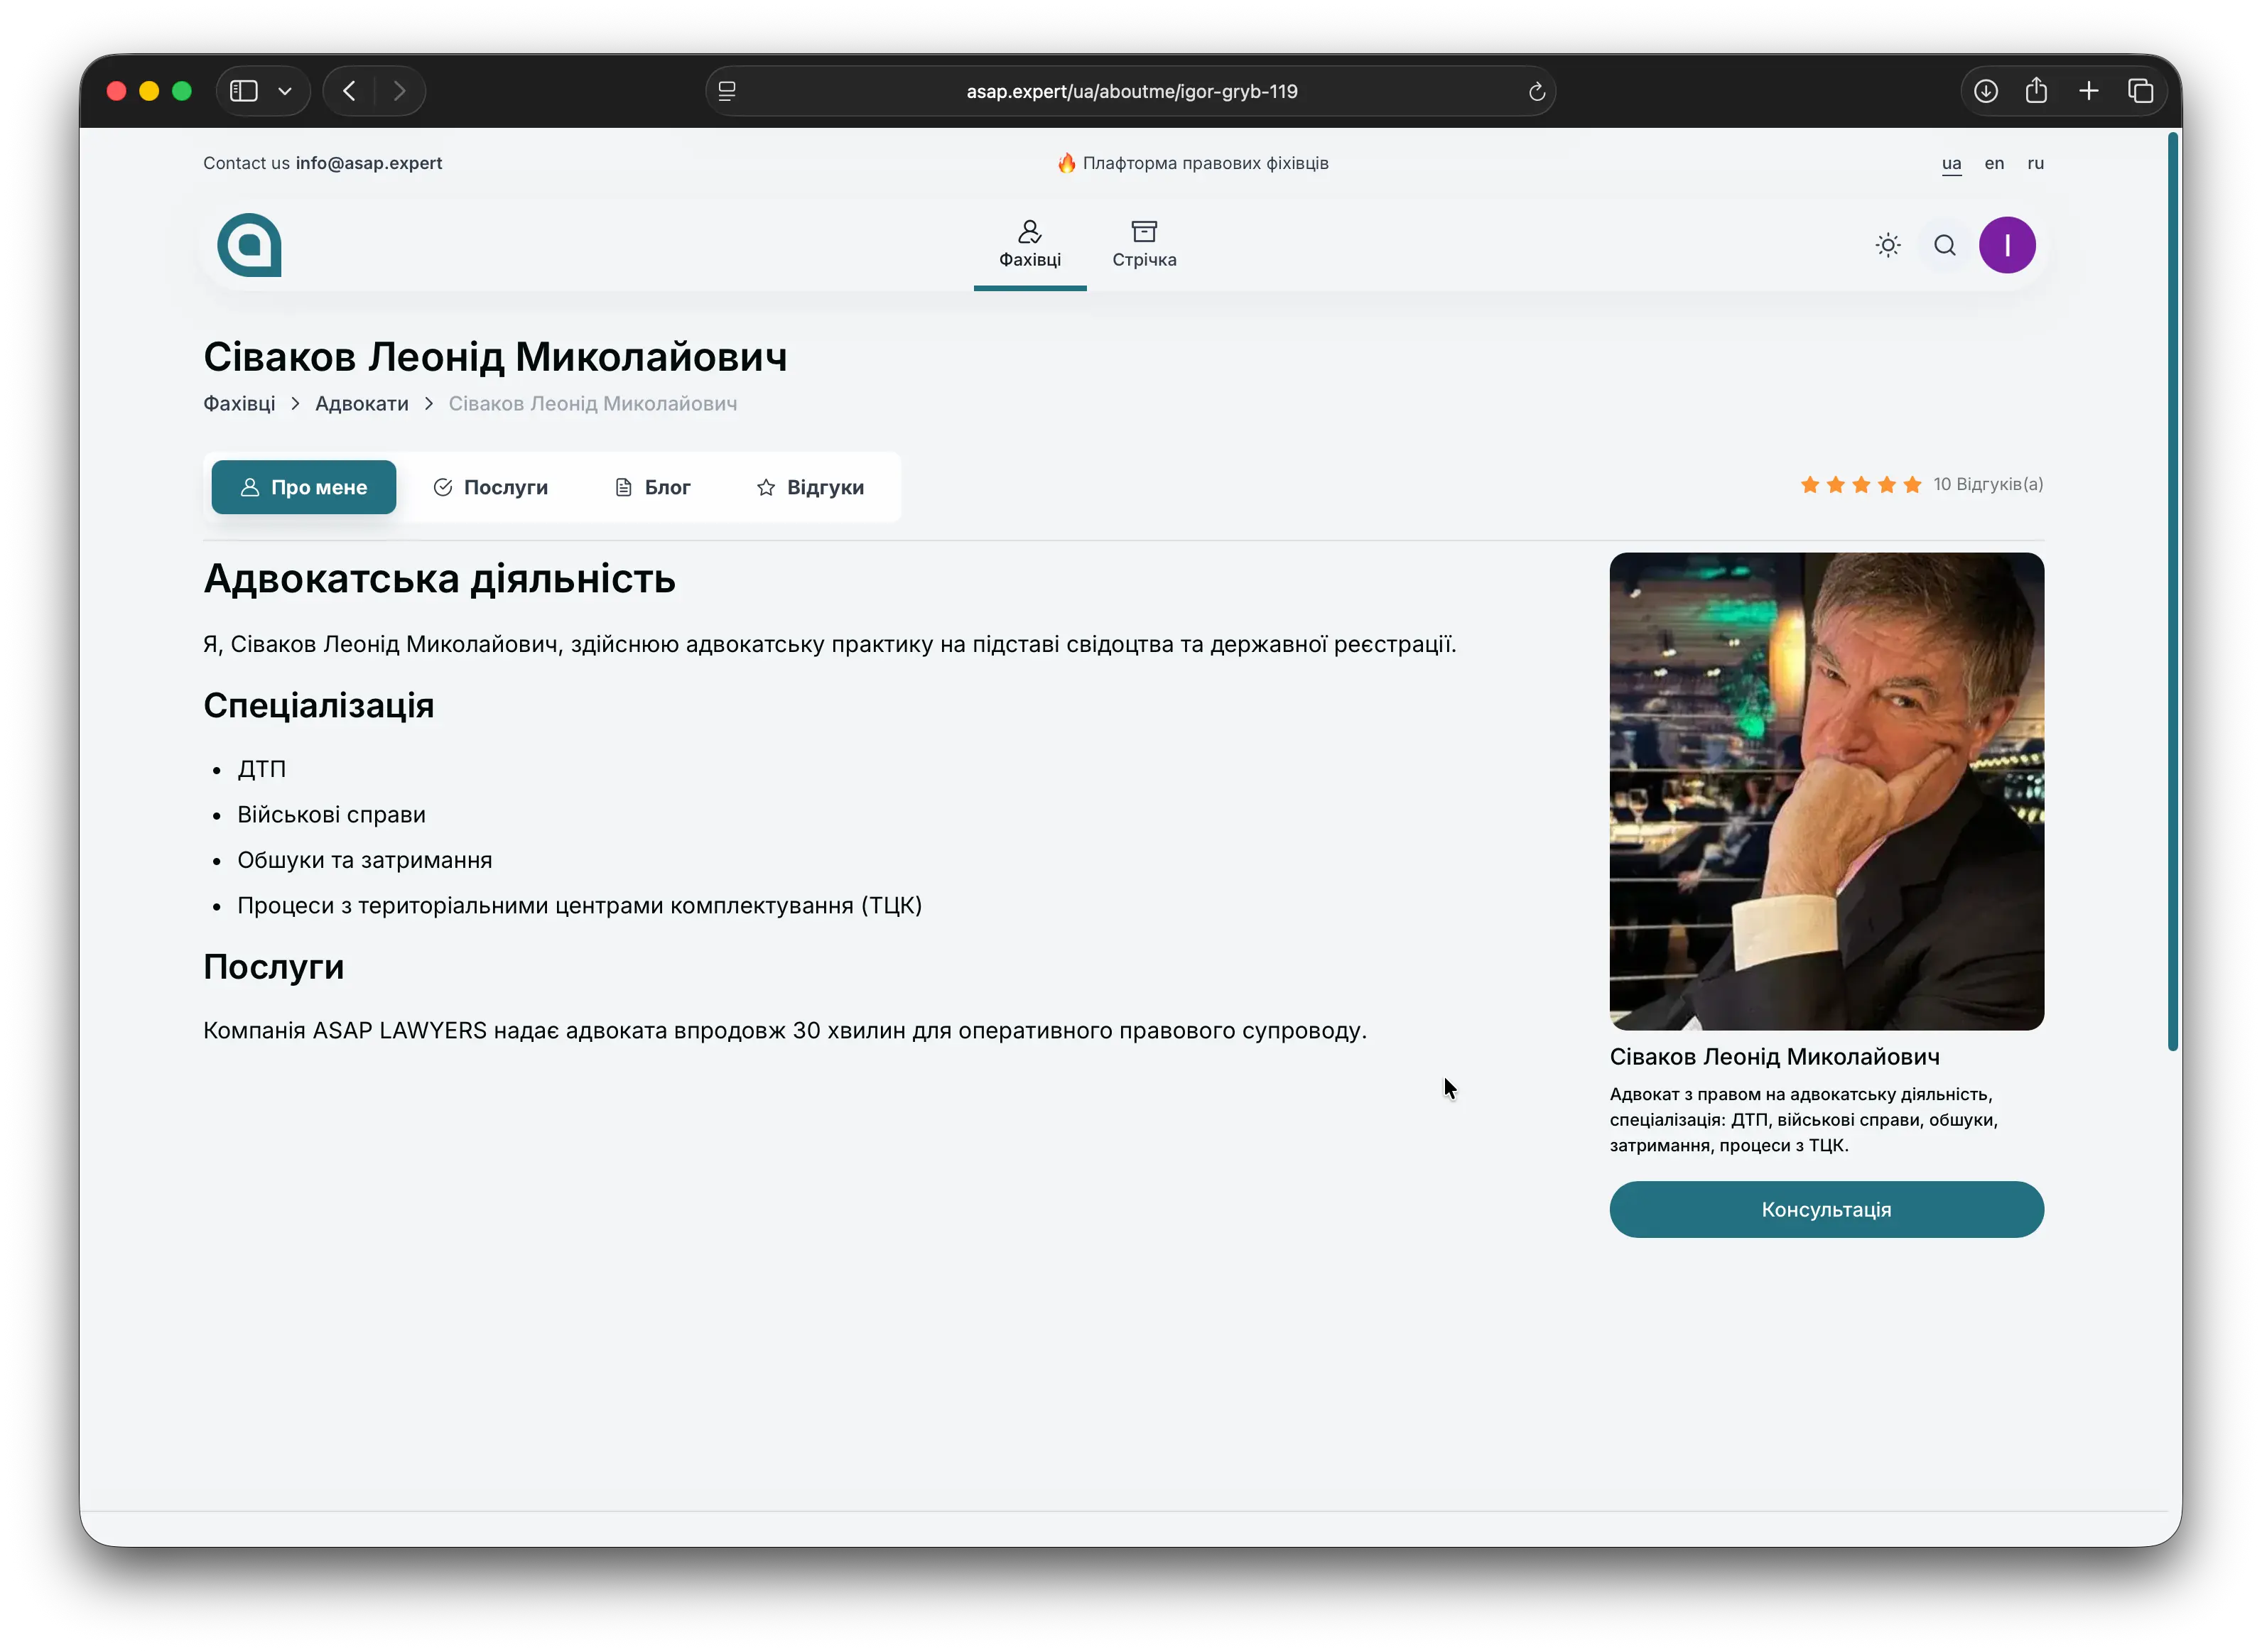
Go to your expert page
After activation:
- Open your public expert page.
- Check how it looks from the client’s point of view: description, photo, specializations, contacts.
You can always come back to editing later to update information, expand your description or add new specializations.